
 Injection at Home")
How to Give Yourself an Intramuscular (IM) Injection at Home
Apr 15th 2026
A simple skill can change how you manage daily treatments at home. Many patients learn how to deliver intramuscular injections at home safely. Intramuscular injections are injected into muscle tissue for faster absorption. This method works better than subcutaneous injections for many important medications today.
Home care has grown fast across the United States in recent years. The Centers for Disease Control and Prevention reports millions of yearly home injections. These are vaccines, hormone therapies, and vitamin treatment injections. The injectable drug delivery market keeps growing due to self-injection therapies.
Risks of infection, nerve damage, and dosing errors decrease when the appropriate technique is applied. Being informed about the proper procedure improves comfort, safety, and success in the treatment.
When Is a Home IM Injection Prescribed?
Doctors prescribe home injections when patients need steady and regular medication dosing. This approach helps avoid repeated clinic visits and saves time each week. Patients often learn self injection intramuscular methods under medical supervision. Common reasons for home IM injections include the following medical needs:
- Hormone replacement therapy such as testosterone injections for long-term treatment
- Vitamin deficiencies like B12 injections to restore healthy body levels
- Certain antibiotics or long-acting medications need deep muscle delivery
- Chronic condition management requiring consistent and scheduled medication dosing
Studies show home injection therapy improves patient adherence and treatment consistency. This method also reduces pressure on healthcare systems and clinic workloads significantly.
Understanding the Four IM Injection Sites
Selecting the right site is a sure way of getting safe and effective absorption of medicine. Adequate awareness of intramuscular injection sites can prevent damaging nerves and blood vessels. Each site has different benefits depending on comfort, access, and injection purpose.
Doctors guide patients based on body type and medication type requirements. Learning these options helps you perform IM injection correctly.
Vastus Lateralis (Thigh) Best for Self-Administration
This site sits on the outer thigh and feels easy to locate. It offers a large muscle area with low risk of nerve damage. Many beginners prefer this option for better control and clear visibility.
Patients using self-injection intramuscularly often choose this site first. The thigh allows stable hand movement during the injection process.
Ventrogluteal (Hip)
This site lies on the side of the hip region safely. Medical experts consider this one of the safest injection locations today. It reduces the chances of hitting major nerves or large blood vessels.
Modern guidelines favor this site due to consistent absorption and safety. Many professionals recommend it for long-term injection routines at home.
Deltoid (Upper Arm)
The deltoid muscle sits in the upper arm area clearly. This site works best for smaller doses like vaccines or quick treatments. Many people recognize this method as the deltoid injection at home technique.
However, self-injection here can feel harder without proper support. It works better when another trained person assists during the injection.
Dorsogluteal: Why It's Largely Discontinued
This site lies in the upper buttock region traditionally used before. It carries a higher risk of accidentally hitting the sciatic nerve. Fat layers here may also reduce proper medication absorption efficiency.
Modern medical practice avoids this site due to safety concerns. Safer alternatives now replace it in most clinical and home settings.
Choosing the Right Needle: Gauge and Length for IM
Needle choice plays a big role in successful injection results. The wrong size can cause medicine to stay in fat instead of muscle. This mistake reduces effectiveness and delays proper treatment response significantly.
Understanding needle size helps improve your IM injection technique quickly. Doctors guide selection based on body type and injection location.
21G-23G, 1 to 1.5 Inch for Most Adults
Most adults use needles between 21G and 23G gauge sizes. This range balances smooth flow with reduced pain during injection. Needle length between one and one and a half inches works best.
Proper length ensures medicine reaches deep muscle layers safely. This improves results when learning how to give an intramuscular injection at home.
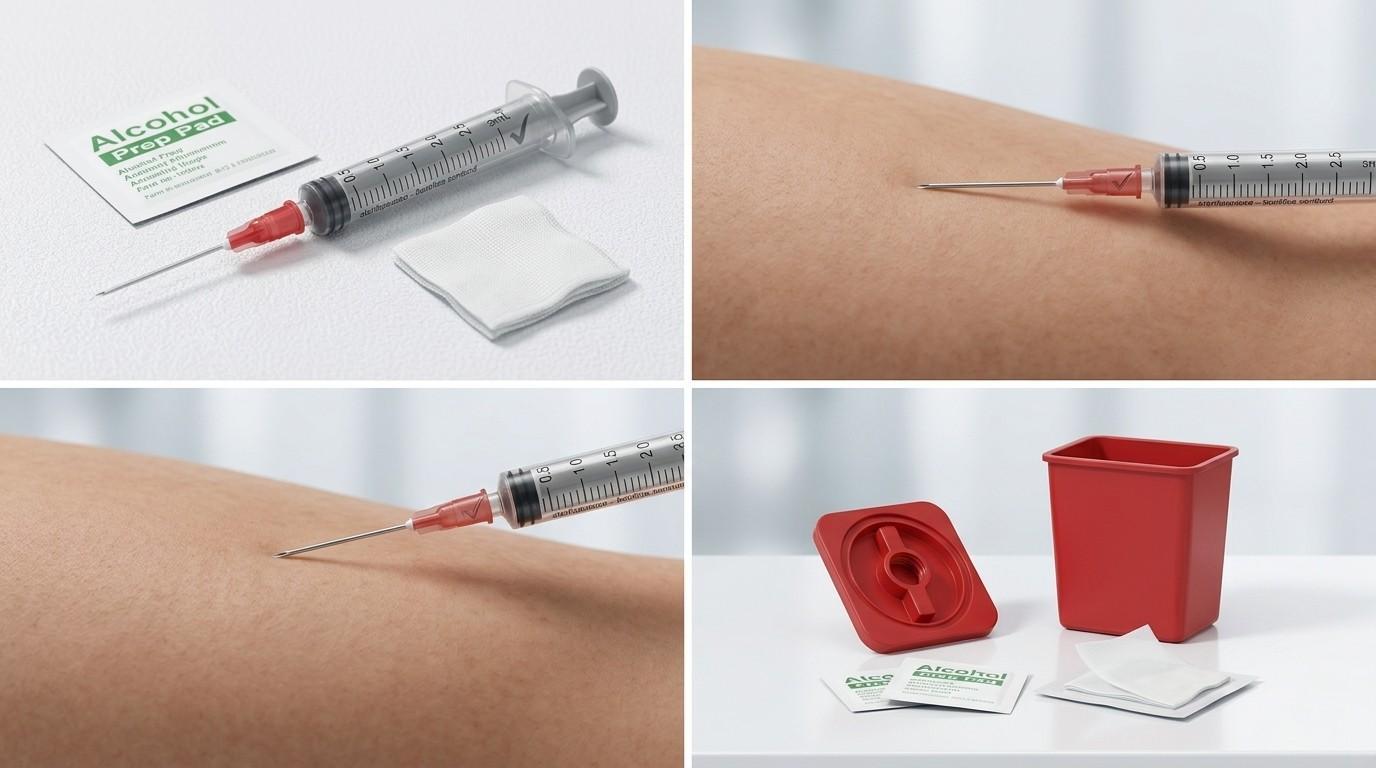
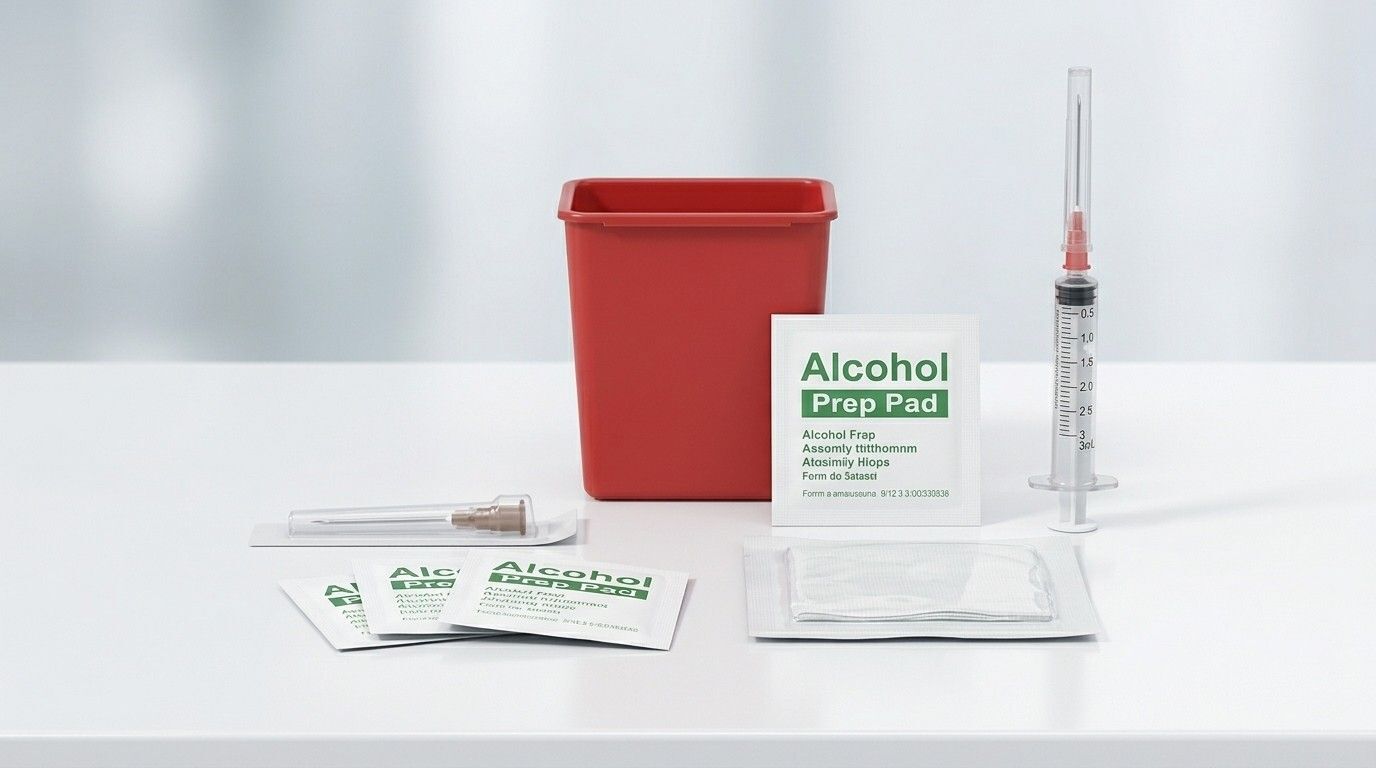
Supplies You Need Before You Start
The process is trouble-free and easy when preparing the supplies first. Clean tools reduce infection risk and enhance the general safety of injections. Every injection session should be done with new and sterile equipment. The following are the basic items you need to start with:
- Sterile syringe and matching needle for correct dosage delivery
- Prescribed medication vial or ampule as directed by your doctor
- Alcohol prep pads to clean skin and prevent bacterial infection
- Cotton or gauze for applying pressure after injection completion
- Sharps disposal container for safe and legal needle disposal
Single-use sterile equipment is always recommended by the U.S. Food and Drug Administration. This rule will be effective in avoiding contamination and the possibility of severe infections.
Step-by-Step IM Injection Process
Following clear steps helps you feel calm and confident when injecting. An appropriate procedure enhances the safety and accurate administration of medication whenever. This structured process supports beginners learning IM injection techniques at home.
Consistency matters when performing IM injection correctly. Every step develops a safe routine which becomes easier with practice.
Step 1: Wash Hands, Gather Supplies, Prep Medication
Wash your hands well with soap and clean running water. Dry your hands with a towel before handling any injection needles or drugs. Take medication as prescribed by your health care provider earlier.
Get rid of air bubbles within the syringe to attain the right dosing levels. Hygiene is important in preventing infection, as highlighted by the CDC.
Step 2: Clean the Site with Alcohol Prep Pad
Apply an alcohol prep pad to clean the selected injection area gently. Move in circular motions starting from the center moving outward slowly. Allow the skin to dry fully before inserting the needle properly.
This step reduces surface bacteria and lowers infection risk significantly. Clean skin improves safety during self injection intramuscular procedures.
Step 3: Position the needle at a 90-degree angle. Insert Quickly
Hold the syringe like a dart to have more control. Put the needle level at a straight ninety-degree angle to the skin surface. Insert the needle quickly into the muscle using steady movement.
A fast motion reduces pain and improves the accuracy of needle placement. This step is key when mastering how to give an intramuscular injection at home.
Step 4: Aspirate (Check if Needed), Inject Slowly
Some guidelines suggest aspiration depending on the medication type and site. Pull back slightly to check for blood before injecting medicine slowly. Inject the medication steadily to allow proper absorption within muscle tissue.
New guidelines say aspiration may not always be required today. Follow your doctor’s advice for the correct IM injection technique.
Step 5: Withdraw, Apply Pressure, Dispose of Needle Safely
Gently pull out the needle at the same angle as used before. Light pressure must be applied with gauze to reduce bleeding or discomfort. Do not rub the area, which will irritate the muscle tissue.
Dispose of a used needle safely in a sharps disposal container. When done well, disposal helps safeguard others and ensures strict adherence to the guidelines of environmental safety.
After the Injection: What to Expect
Knowing normal reactions helps you stay calm after each injection session. Most people experience mild discomfort, which fades within a short time. Understanding body signals improves confidence in self injection intramuscular routines.
Monitoring helps you spot unusual signs early and take action quickly. This step supports safe recovery after deltoid injection at home or other sites.
Normal Soreness vs Signs of Complication
Normal reactions include mild soreness, redness, or slight swelling at the site. A certain amount of hardness might be present, but it tends to disappear in a short time. Immediately seek medical assistance in case of serious warning signs:
- Severe pain or increasing swelling after injection
- Fever or pus forming at the injection area
- Redness spreading beyond the original injection site
Proper technique keeps complications rare according to clinical safety studies. Correct practice reduces risks linked with intramuscular injection sites usage.
Common IM Injection Mistakes to Avoid
Avoiding common mistakes helps you perform injections safely every single time. Many errors happen due to a lack of training or rushed injection steps. Learning correct habits improves results when practicing how to do an IM injection. These common mistakes can seriously affect safety and treatment success:
- Using the wrong injection site causing pain or nerve injury
- Choosing the incorrect needle size leads to poor medication delivery
- Injecting too quickly which increases discomfort and tissue irritation
- Skipping skin cleaning which raises infection risk significantly
- Reusing needles or disposing of them improperly after use
Studies show user error causes most injection-related complications today. Proper education improves outcomes in how to give an intramuscular injection at home.
Learning this skill gives you control over your treatment routine daily. You gain independence while maintaining consistent medication delivery at home. Following proper steps ensures safety during every IM injection technique session.
As home healthcare grows, these skills become more important than ever. Start practicing carefully and consult your doctor for guidance when needed.
Take control of your care today and build confidence step by step.